Here’s a craft you and your kids could do. Make one for your child’s room — or even for Dad!
What You’ll Need
Wood Planks
Hand Saw
Hammer
Finishing Nails
White Paint
Black Paint
Paint Brush
Cardstock
Pen/pencil
Scissors
What You’ll Do
- Take two of the wood planks and set them apart horizontally as far apart as you would want the “shirt” size to be tall. Then line up all the planks vertically with a little space between each and hammer them into place. Be sure that your nails are not longer than the width of the two planks. Take your hand saw and cut off the rest of the horizontal planks to make it flush with the last vertical one.
- Paint the entire thing white and set aside to dry.
- While that’s drying, take a piece of cardstock and draw out a number. Cut that number out of the middle of the paper to make a stencil. Be sure not to cut into the outer edges or it will mess up the stencil.
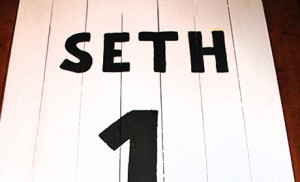
- Tape your stencil to the center of the vertical wood planks and fill it in with black paint. You can use any color you want for this, just depends on the baseball team you’re trying to represent.
- Now, you can either do a stencil for the letters of the name you want to include — or freehand it like I did — along the top above the number.
- Fill in the letters with black paint, too. Allow to dry.
When it’s all done, you can hang it on a wall or prop it up on a bookshelf. The wood planks with the space between them make it look like a striped baseball shirt.


